How to query deleted records
Community conferences like Midwest and Mile High are in full swing, Dreamforce is on the horizon and, with all the traveling to and fro, hither and yon, admins and devs everywhere might find themselves googling things they swear they “knew how to do, just last month” and that makes it the perfect time for the next installment of our Salesforce “How to” ABCs! The series where we tackle the most commonly Googled Salesforce questions, letter by letter, to help Trailblazers find the answers they’re looking for fast!
Today’s letter is “Q” as in, “How to query deleted records”. Let’s dive in!
Today’s topic sees us diving into SOQL, Salesforce Object Query Language, used to read information stored in your org’s database. There are many use-cases for SOQL and it can help make our lives a bit easier, but it also may feel overwhelming and difficult to understand. Worry not as many resources available today can help simplify the ease of use to extract all sorts of information within a Salesforce org.
We seek to create a query that retrieves all deleted records within an object of an org. Simple enough right? Well, Yes and No. First up you would think an Admin could whip this up real quickly, right? What if that Admin was a Jr staff member that just got hired and is new to Salesforce? They understand the problem but don’t know where to start or how to about doing this. Don’t worry, these options may provide some assistance.
We will present two methods to achieve this which allow you to choose based on your preference. Both provide a different perspective and are simple enough to deploy yourself. Let’s begin.
Using Workbench
The first one consists of using a legit and preferred Admin/Dev resource called Workbench. This essential and user-friendly tool helps users interact with data, metadata, and jammed pack with various features to manage your Salesforce org.
Select the org environment which is either (Production or Sandbox) then select the API Version (as of today is at 58.0). Then make sure to agree to the terms of service. From here just click on the Login with Salesforce button on the bottom right-hand corner to begin.
You may be prompted to enter your login credentials but if you already logged it will take you straight to their homepage.
 Workbench
From here you can head over to the queries nav option and select SOQL Query from the dropdown list.

Next, you will enter the sub-page which will be used to create your query. One of the benefits of using this tool is that it creates the query code you will need in order to properly retrieve the data you seek. In this example, we need to query deleted records and this tool already helps us traverse all the data rows available within our database which includes deleted and archived records.
It’s good to note that deleted and archived records may not be retrieved by using standard SQL syntax. This method helps us toggle whether or not we want to include archived records to ensure all the data sought is gathered.
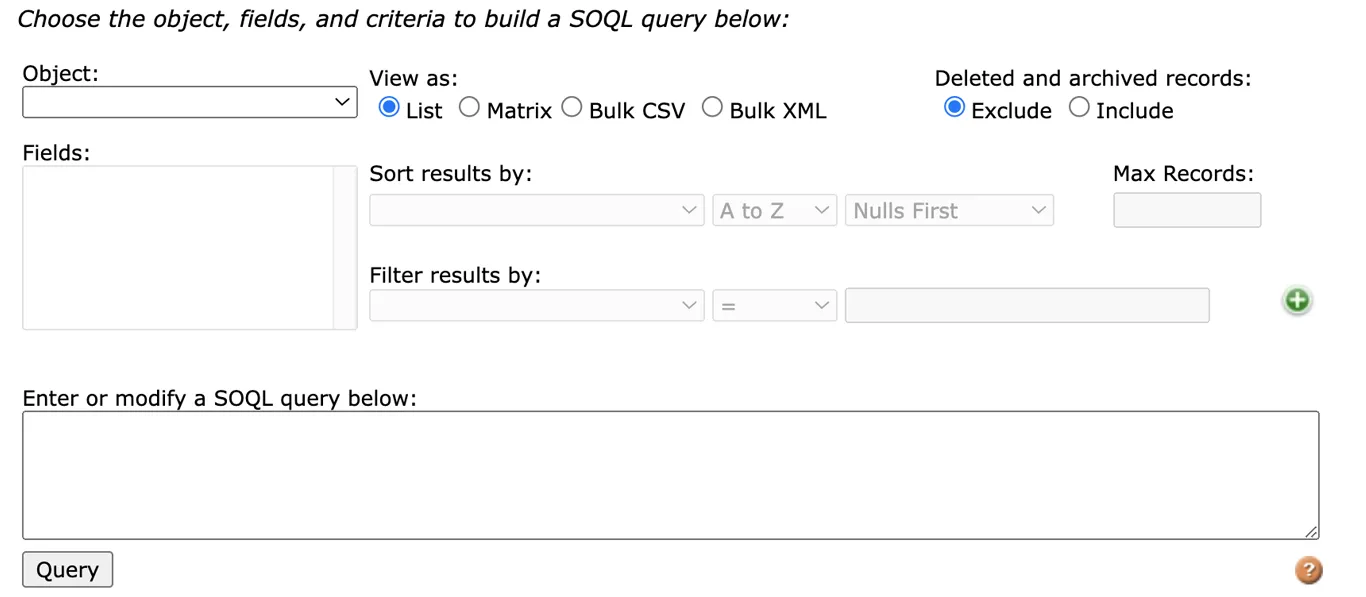
We begin building our query by choosing what object we plan to query deleted records from. In our case it’s for Accounts — so will choose that. Then will select the Fields we’d like to return for each record that meets our conditions to ensure we have all the data we need. We proceed by selecting Account Number, Name, and IsDeleted. Simply hold the shift key to select multiple fields or just type them in on the query text below.
We want to obtain a list view of the records that meet our conditions so will keep the View as to List. You have the option to sort the result by any field type or leave it blank — for this walkthrough, we left it blank.
The next two settings are highly important. First, we need to Include Deleted and archived records, because if we don’t any archived deleted records will not be added to our list view and the same will go for deleted records — which is what we are trying to obtain. Next, will need to identify when a record has been deleted. Good to know that Salesforce toggles a flag when a record is deleted and will be used to find and filter our results.
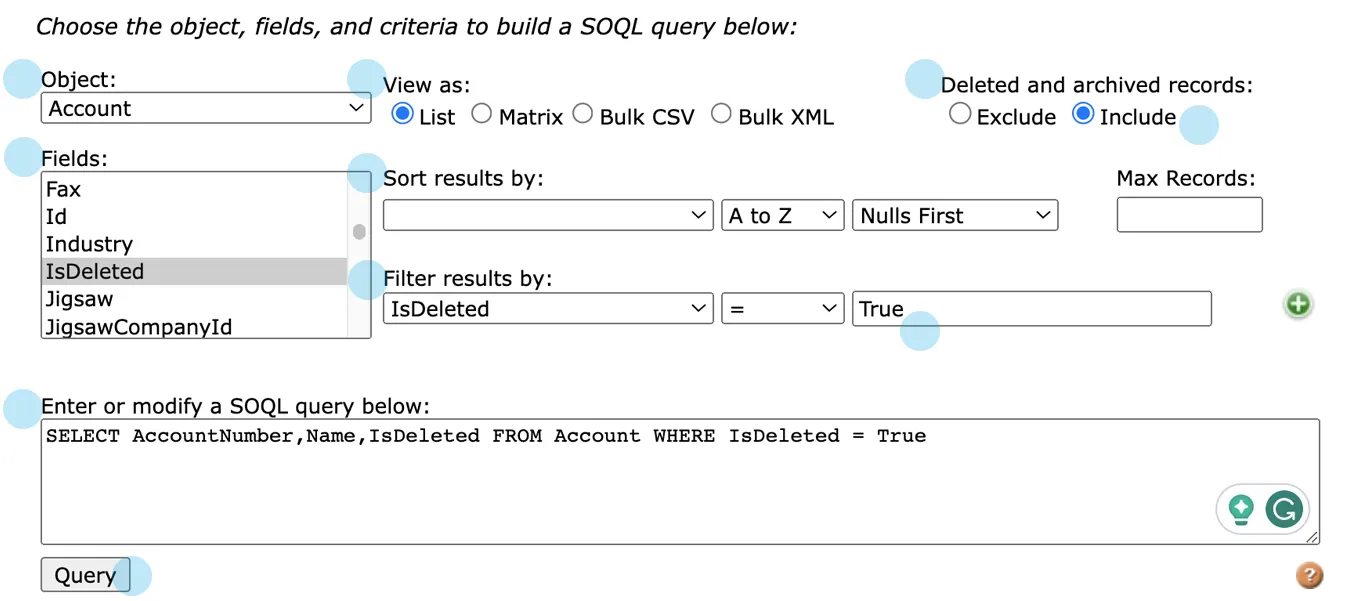
Make sure to select IsDeleted from the dropdown under Filter results by: operation to equals to and the value to True.
If you had not already noticed each time you changed a setting the query would be updated to reflect those changes. The final SOQL query consists of the following.
SELECT AccountNumber, Name, IsDeleted FROM Account WHERE IsDeleted = True
If we read this back it says to include the following fields (Account Number, Account Name, and Is The Record Deleted Flag) from all the Account records where the flag IsDeleted is set to true which means a record within the account object has been deleted.
Pressing the Query button will output a list view. As you can see we had created three test accounts within the Accounts object and then deleted them to test and ensure the populated on the query results list view below.

Using Anonymous Window
The other method and one preferred when you are trying to quickly debug any issues, don’t need a fancy output, and use the Developer Console, is Anonymous window. Whereas using Workbench is great for us non-coding peeps, Anonymous Window favors those who love to read between the lines.
This is fairly straightforward as well just need a bit of understanding where the information you seek is available to review. First up head over to the developer console window by selecting the Gear Icon and choosing Developer Console from the dropdown window.

This will fire up a Dev console window ready to use. Simply use the nav menu scroll over to Debug and select Open Execute Anonymous Window from this dropdown menu.
 Developer Console
This will launch the Anonymous Window where you can go ahead and take the following Apex code to help output the same information as method one under the debug console window. This method will not create a nice list view and does not have the option to tweak the code using a user interface. Instead, you’ll have to adjust the code directly.
Worry not the code is straightforward and just runs a loop for each record from all records (archived or deleted) within the Accounts object to see if the IsDeleted flag is set to true. Same thing as method one but does not require you to use an external app instead just fire up the Dev console and type in the following Apex code within an anonymous window.
for(Account acc : [SELECT Id, Name FROM Account WHERE IsDeleted = TRUE ALL ROWS]) { system.debug(acc); }

Make sure to check off the Open Log box before pressing the Execute button to ensure a log window launches when the code is run. Upon running the code the log will populate with various timestamps as below.
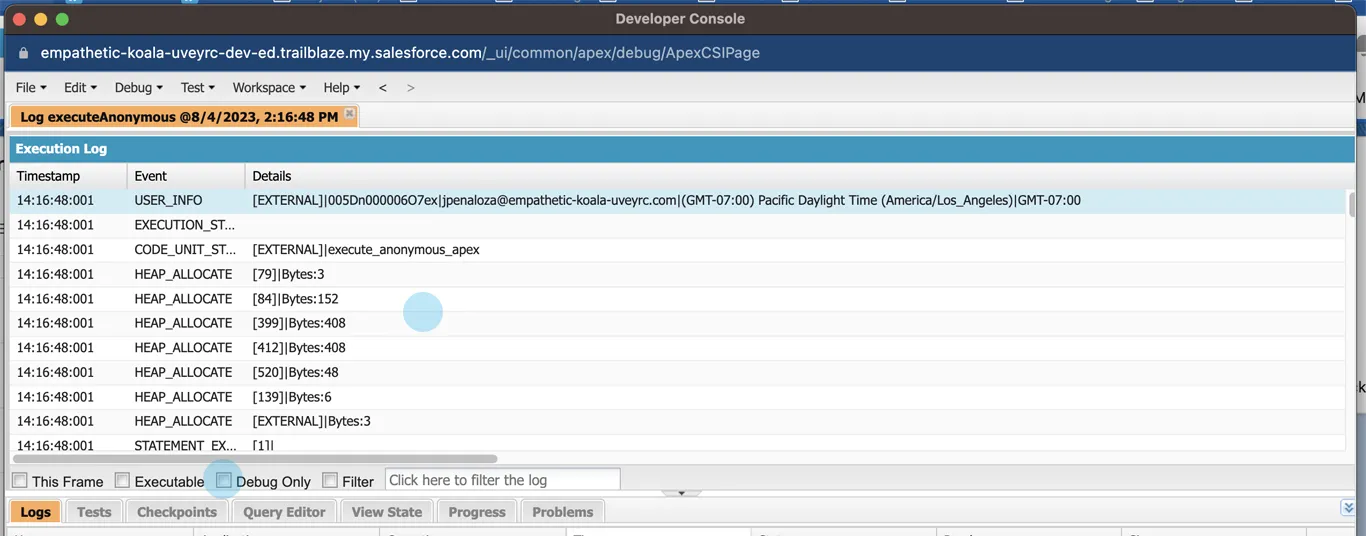
To filter the timestamps and obtain the deleted records you need simply check off the Debug Only box and the log will automatically filter with only the deleted record information as below.
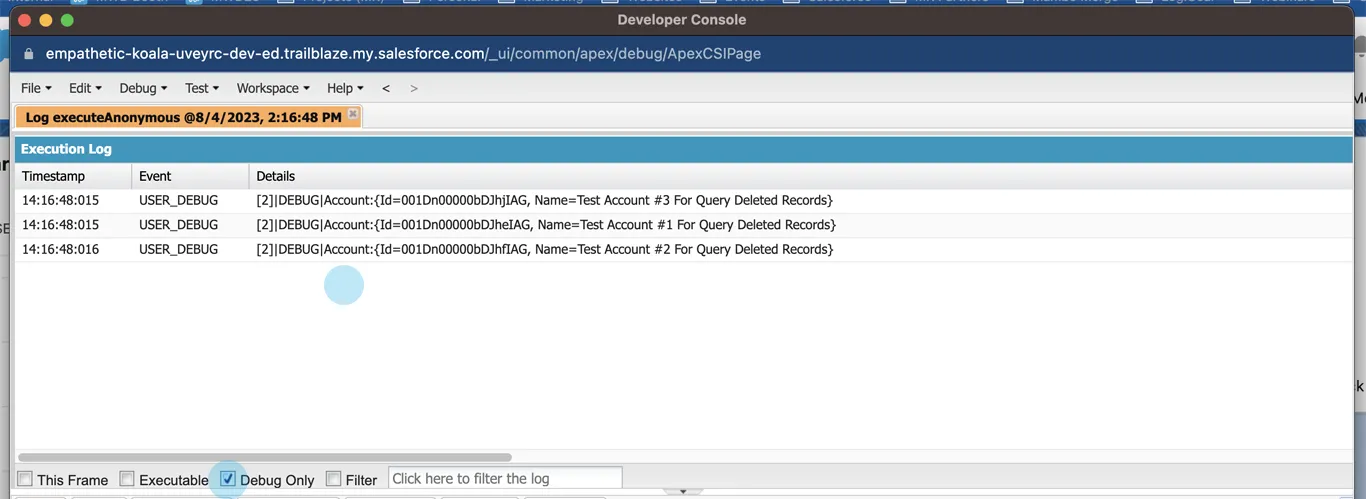
In our example, we mentioned we had deleted three records from our Accounts object which appear as they did within Workbench. With this method, you avoid the need to use an external app and quickly get the data you seek in a raw-only mode. While some people may not appeal to this style others praise these simple tactics to quickly view the information they need.
No matter the method you choose, there are many roads to the same destination so try them out and see which feels better to you!
Thanks again for stopping by and we’ll catch you on the next one!

